Learn how to use a Google Analytics Test View to bulletproof your configuration. This post includes the best strategies and tips to optimize your Analytics setup testing process.
In the Google Analytics Setup Mastery Course you can learn all the nitty and gritty behind a solid Google Analytics implementation.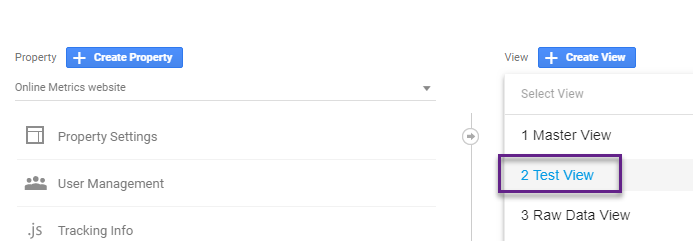
One of the course students asked me the following question:
“With so many changes and configurations that we must or can in Google Analytics, do you have a checklist or guidelines on how to test new configurations in the Test View?”
In this post we’ll start with a quick recap on the Google Analytics account structure and then take a look at the Google Analytics Test View and how to use it most effectively.
Table of Contents
- Google Analytics Account Structure
- Three Must-Have Views
- Google Analytics Test View Deep-Dive
- Concluding Thoughts
Google Analytics Account Structure
In Google Analytics you can make configuration changes at the account, property and view level.
You need to know that the Google Analytics data is processed at the property level.
Sidenote: in over 50% of the Google Analytics Audits I have encountered Personally Identifiable Information.
And this is a huge red flag. Wonder how it looks like when you get caught?
A while ago Simo Ahava shared this example on Twitter: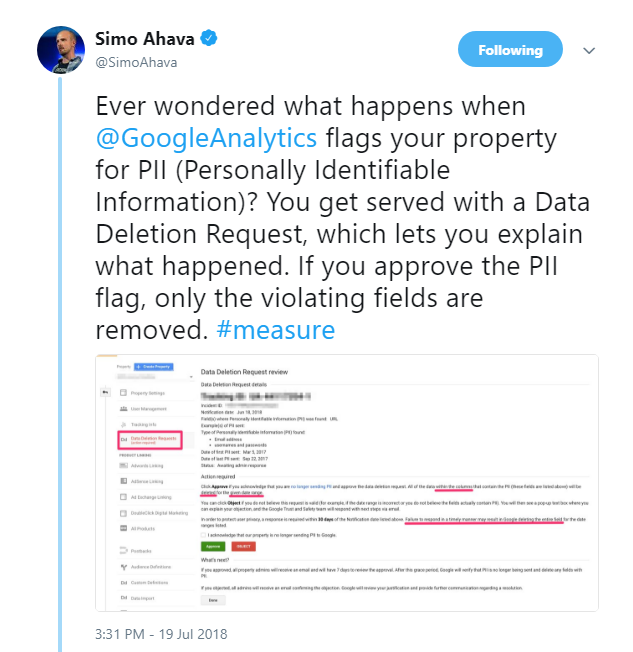 I have brought up this example for three reasons:
- Regular Google Analytics Audits are crucial to integrate in your business.
- PII issues should not be ignored, but properly solved ASAP.
- It is not enough to solve this at the view level as the data is collected and processed at the property level.
Keep in mind that you can solve a lot of challenges at the view level, but not everything. The main focus of this article is on view-level configurations.
Three Must-Have Views
Let’s recap what I have shared in previous articles.
One of the three Google Analytics views that every business should set up is the Test View. The two other views are the main or Master View and the Raw Data View.
01 Master View is your working view. Usually, you apply filters and other custom configurations to this view. This to gather the most accurate and useful data to work with. (Almost) everybody in your organization – and involved with Marketing/Analytics – should get access to this view.
02 Test View is very important and serves as a testing environment. This is where you test all planned changes first. We’ll further discuss this view in a minute. Limit the number of people that get access to this view.
03 Raw Data View is an untouched view where you don’t make any modifications that alter the data stored in the view. Limit the number of people that get access to this view.
Note: be extremely cautious with granting edit-level permissions to whom and at what level.
Google Analytics Test View Deep-Dive
In this chapter I will share all that I’ve learned about effectively using the Test View. With the goal of optimizing your view-level testing processes in Google Analytics.
How to Get Started
There are three main scenarios:
- New Google Analytics implementation.
- Existing GA setup with a few, minor issues in the views setup.
- Existing GA setup with major issues in the views setup.
In my experience, most Analytics accounts fall in category three, but let’s start with number one first.
1. New Google Analytics Implementation
This is the easiest scenario as you don’t have to deal with decisions in the past and can go your own way.
In this case I do two things (one specific action):
- Create a 02 Test View first.
- Wait with creating the Master View, Raw Data View and any other views.
Later, you will find out that you can copy quite a few settings when copying the initial Google Analytics Test View.
This is why you want to wait with creating the Master View (and Raw Data View) at first. It’s a more efficient way to go through the setup process.
2. Existing GA Setup with Only Minor Issues
Is it just about tweaking one or two filters for your company or client? And everything else is looking fine? This is more the exception that the rule.
In this case you can simply copy the Master View (if present) and then rename it to Test View.
Test your changes in the Test View, wait for a few days and replicate the setup in the Master View. Usually, a lot more complexity is involved.
3. Existing GA Setup with Major Issues
Most often I come across GA setups with many, serious flaws. PII is a big one, but as discussed before, this must be solved at the property level and involves creating a new, non-PII property if you want to be safe.
Five issues I regularly encounter (and there are a lot more!):
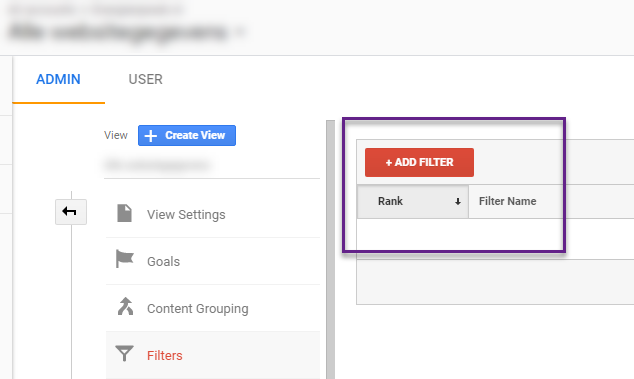
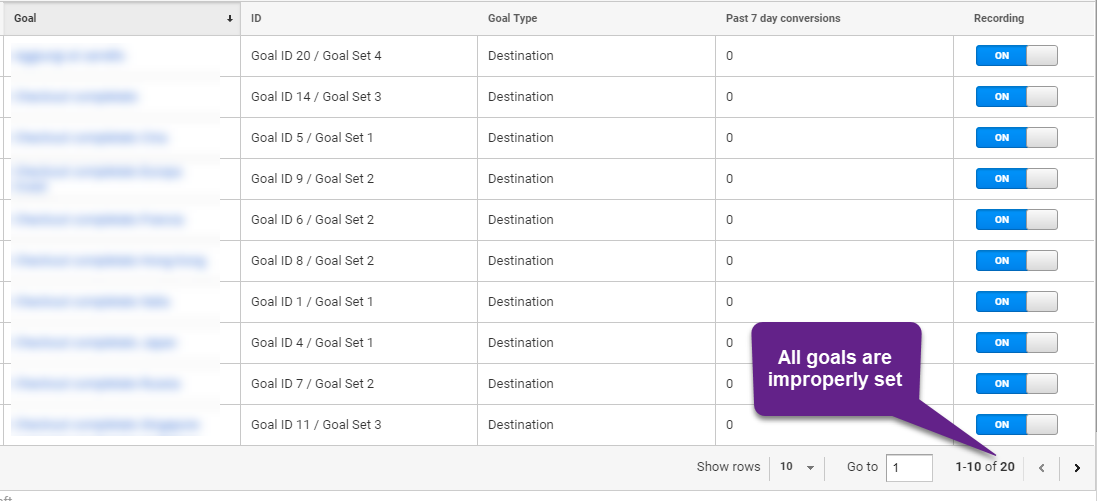
1. Filters aren’t applied or applied in the wrong way.
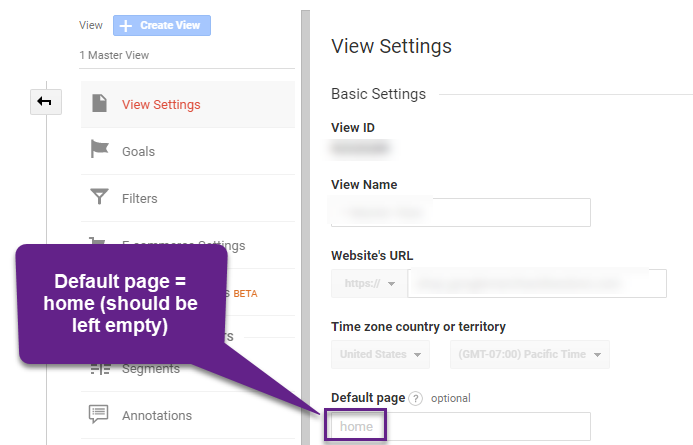
2. The default page setting is incorrectly used and distorts the content reports data.
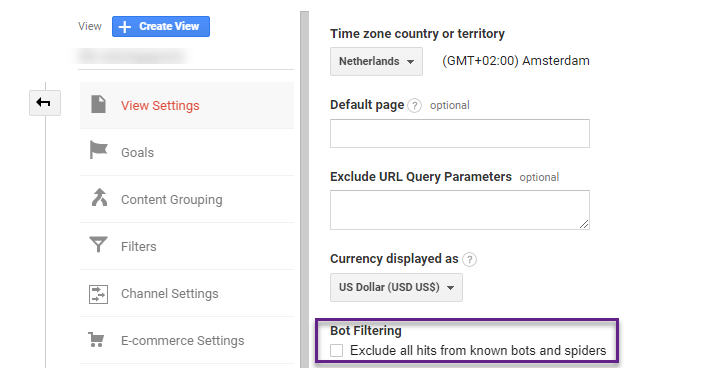
3. Spam and bot traffic is not taken care of.
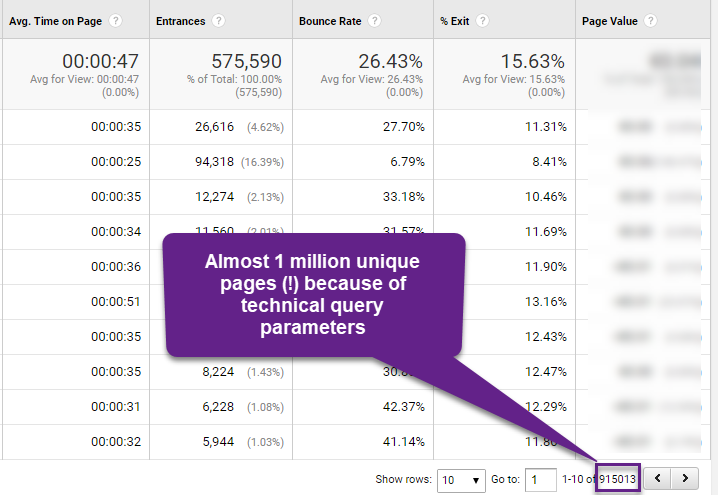
4. Query parameters are not excluded in a proper way.
In this case I recommend creating an entire new view structure and leaving the current views as they are.
“Do we really need to start from scratch?”
Yes, this is a must if you want to act on reliable, useful data and are dealing with so many issues.
Sure, you can “fix” the current Master View, but making a date/data comparison isn’t appropriate. Or, even worse, you connect it to one of your fancy AI analysis tools and it partly picks up inaccurate data…
So, I treat it is as a new implementaton fed by the learnings from the current GA setup. Hopefully you can replicate some of the things done in the current setup.
As a consultant I simply also prefer to not mess up the current views. Politics, current reports… there is a lot that might interfere.
What Items to Test
You should test everything.
Ok, maybe not every tiny piece of the Google Analytics views setup, but definitely the ones that have a significant impact on your data and analysis.
Here is a list of view-level items I suggest testing before applying to the Master View:
- Google Analytics filters – great impact on the data that is shown in each view.
- Goals – you don’t want to mess up your conversion measurements in the main view.
- Exclusion of query parameters – this action can have a serious impact on your data, so make sure to test it first.
- Site Search integration – this view-level setting can bring great insights for your business. Most often it’s straightforward to set up, but make sure to always test it.
- Bot filtering – you want to know the impact of the bot/spam measures on your data.
- Default page – you should leave this setting to blank in 95%+ of all setups. Want to change it? Make sure to test it first!
- Content grouping – the data should come in as planned. Manual setups (without modifying Tracking Code / GTM) can be a great solution, but need to be accurately defined.
- Channel settings – test the new Default Channel Grouping setup before implementing it in your Master View.
- Enhanced Ecommerce – Checkout Labelling isn’t that difficult (compared to the implementation), but a mistake is easily made.
- Calculated Metrics – test them in your Test View first to ensure that the extra metrics exposed in the Master View are accurate and meaningful.
Did I miss any? Let me know in the comments section!
Testing Multiple Changes at Once
I am big favorite of testing a few things at a time. Simply to be more efficient!
You need to keep in mind that:
“The sum of two changes might have a different impact compared to seeing the changes separately.”
AND
“One change might affect the outcome of another change.”
This is especially true when working with filters. Let’s look at an example below:

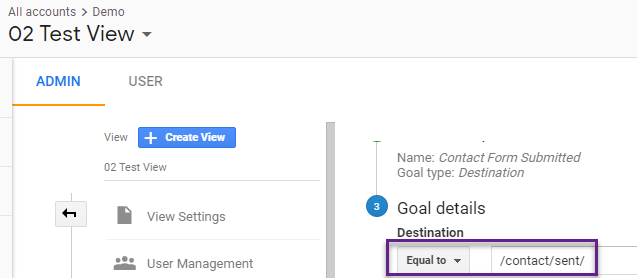
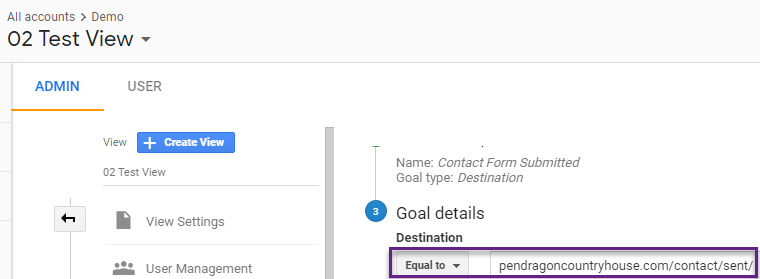
This “thank you page” is indexed in Google.
URL: https://pendragoncountryhouse.com/contact/sent/.
First change: configure a goal for this “thank you page”.
But what if a cross-domain implementation would make sense? Then they might want to attach the Hostname to the Request URI (via a filter).
Second change: configure a filter to attach Hostname to Request URI.
The filter looks like this:
- Filter Type: Custom filter > Advanced
- Field A: Hostname
- Extract A: (.*)
- Field B: Request URI
- Extract B: (.*)
- Output To: Request URI
- Constructor: $A1$B1
Do you see the problem?
By doing this, your original goal setup won’t work anymore!
Third change: modify the goal setup so that it works with the newly implemented filter.
There could be a ton of more cases where changes interact with each other. Be aware of that!
Sometimes you want to split the planned changes in two groups:
- Must-have changes that are related to data reliability and basic optimization (e.g. filters and goals).
- Nice-to-have changes that are related to data enhancements / advanced analysis (e.g. content grouping).
This can be very useful when working with particular clients and not willing to overwhelm them.
It can become even more complex when you need to test property-level settings as well.
Student question:
“I’m currently dealing with a huge publisher site and one of the tasks I have to handle is GA reconfiguration. Some of the changes I want to test in GA are:
- Edit the Default Channel Grouping.
- Strip query parameters.
- Implement cross-domain tracking.
- Apply lowercase and hostname (for cross-domain tracking) filters.
There is even more that I would like to do, but you can see that applying all these changes at the same time will be challenging.”
My answer:
“In this case I would first make a list of all items/changes involved:
- What are property-level changes?
- What are view-level changes?
Cross-domain tracking is a data collection / property level feature. You can affect which data comes in each view, but basically it is a property level change (where data is collected/processed). So I would start with the technical (GTM) setup of cross-domain tracking and see whether everything works as expected.
The second part – after the tech basics are in place and work – would be to affect the data that is stored in each view (related lowercase and hostname filters). Sometimes, you might want to set up separate views for each domain name, but be careful when analyzing the data.
At the same time, you could work on the DCG setup as there is no correlation to cross-domain tracking. The same counts for stripping query parameters as it is not connected to base URL structure.
To recap, I would make a list of all proposed changes and apply logic on when to test what changes before implementing them. In terms of priority, always start with changes in favor of data reliability, data enhancements should come later.”
Every situation is different and there is never just one answer or solution to a challenge!
Copy Your Test View
You can copy the Test View settings when copying the view instead of adding them all manually to the different views.
Let’s assume you have thoroughly tested the settings and want to add the Master View. Here are the steps to take.
Step 1: add a temporary “no traffic” filter to the “Test View”.
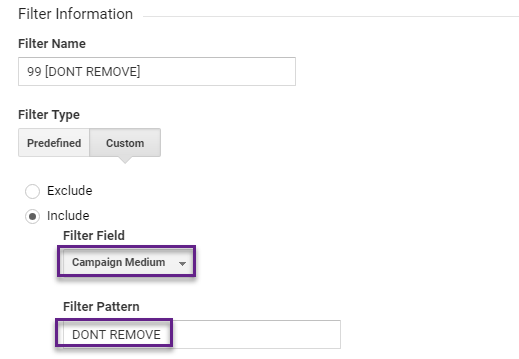
Note: this helps prevent the Master View to immediately store data. You can add any filter that has the same effect.
Step 2: copy the Google Analytics Test View.

Step 3: rename it to 01 Master View.
Step 4: check all settings before removing filter 99.
You will find that not all settings are automatically copied. Review the list below: Make sure to add the Content Grouping, Channel Settings, Calculated Metrics and Checkout Labelling (if applicable) manually.
Step 5: remove filter 99 and you are all set!
The Role of Annotations
Annotations in Google Analytics are a very useful way to keep track of setup and configuration changes.
It is very useful to add them especially when modifying a Google Analytics view along the way.
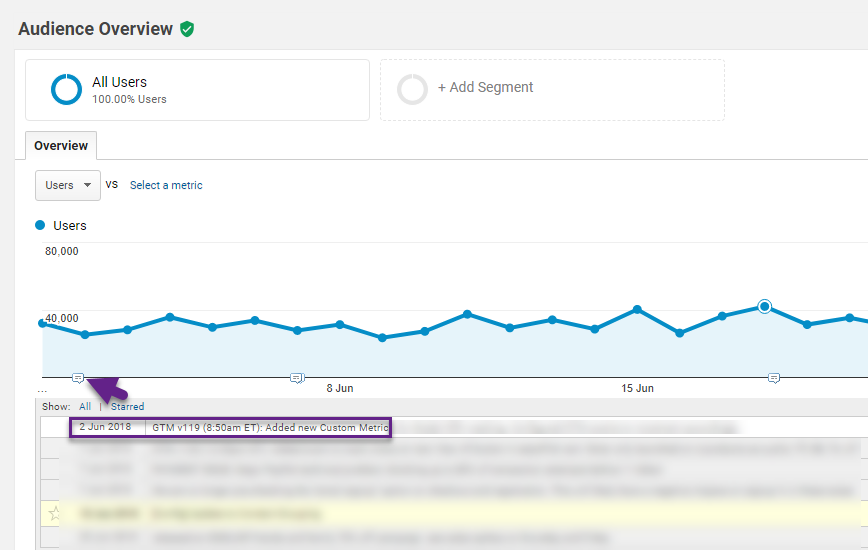
Reading suggestion: How to Use Google Analytics Annotations for Better Insights.
Concluding Thoughts
Here are a few concluding remarks:
- A big part of your success with Digital and Google Analytics comes from thoroughly testing your setup.
- The Google Analytics Test View is one of the three views that should be present in every setup.
- There are three main scenarios when dealing with a GA setup:
- New Google Analytics implementation.
- Existing GA setup with a few, minor issues in the views setup.
- Existing GA setup with major issues in the views setup.
- For scenario #1 and #3 I recommend setting up a new view structure instead of modifying the existing views.
- Keep in mind that not all settings are automatically copied when copying a view.
- Annotations are very helpful and recommended to use when dealing with configuration changes.
This is it from my end – would be great if you have learned something new! Happy to hear about your experience and thoughts when testing a Google Analytics setup!
One last thing... Make sure to get my automated Google Analytics 4 Audit Tool. It contains 30 key health checks on the GA4 Setup.
Hi Paul,
Thanks for Sharing a great guide about test view in GA.
It is a great feature, I am gonna try this.
Thanks
Joyita
Thanks for the heads up Joyita! You should definitely try out working with a test view in GA.
Hi Paul, I was recently just doing the basics.
Just created the Test and Master view, both filtering spiders and bots, and the Test view excluding my own IP. But since then, the Master view, which has no filters or goals, it’s just getting 1/3 of the data comparing the Test view… when it should be the other way, as the Test view as at least 1 filter more applied.
Do you know why is happening this?
Hi Ric,
I recommend reviewing all settings as this is not the data you would expect. Even if the IP address filter is incorrect, you should see the same amount of traffic.
It looks like there is another setting in the Master View interfering here.
Best,
Paul
Hi Paul,
How do you set up the Test View to be internal traffic only? We have so much traffic that it makes testing in realtime in GA impossible.
Hi Brian,
Maybe you could narrow down to your “own” traffic by drilling down on location (City) and some other dimensions?
If not possible, you can create a test view for these purposes based on an IP include filter:
Custom > Include > IP Address (Filter Field)
Hope this helps!
Best,
Paul