Setting up your Google Analytics 4 property is challenging. This blogpost covers all the options that you have when optimizing your new GA4 property configuration.
You need to think about many different aspects when setting up the data collection in GA4. One crucial thing to get right are the property configuration options.
You will learn how to deal with 15 property configuration options now available in Google Analytics 4.
Table of Contents
In Google Analytics 4, there are many different settings at the property level. You cannot create reporting views (yet) like you are used to do in Universal Analytics. This means that you need to define many settings at the property level.
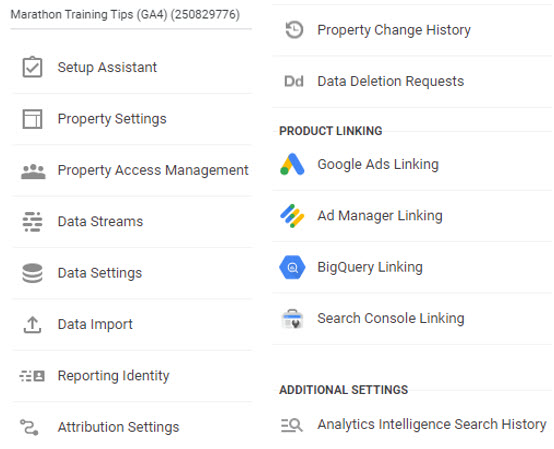
Above you can find a quick overview of all property settings available (in most GA4 properties) at the time of writing.
I will share my tips on each of these so that you can get the most out of this initial setup.
1. Setup Assistant
The setup assistant is not really a property setting, but I wanted to mention it as it can be helpful during the setup process.
It allows you to connect your Universal Analytics property to your new Google Analytics 4 property. By doing this some of the previous settings of Universal Analytics will be copied to your GA4 property.
Note: there is no tool to backfill your new Google Analytics 4 property with historical data. Your Google Analytics 4 property only collects data going forward. This is one big reason why you should start with the initial setup of GA4 if you haven’t yet!
Here is an example of what it looks like in Universal Analytics and GA4.
Universal Analytics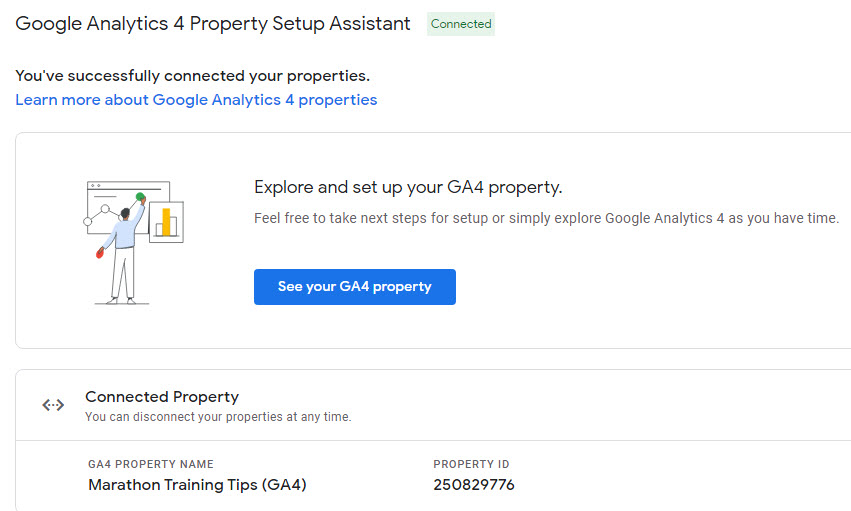
Google Analytics 4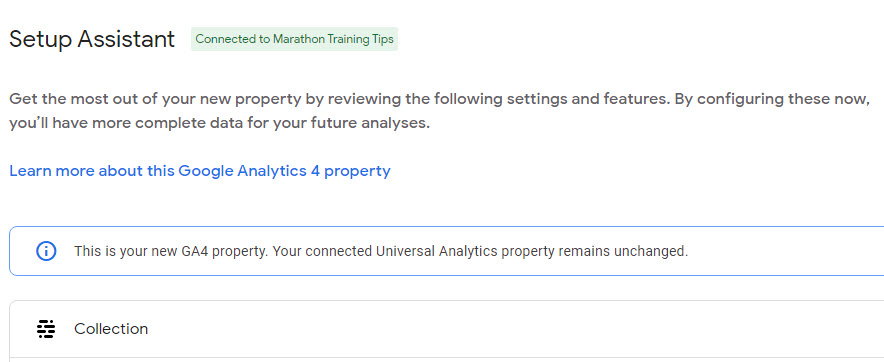
The Setup Assistant provides quick access to managing:
- Tag installation / Data streams
- Enhanced measurement
- Google Signals
- Link to Google Ads
- Link to BigQuery
- Audiences
- Conversions
- User management
In short, it’s a useful area to quickly learn how to navigate through some key options in Google Analytics 4.
2. Property Settings
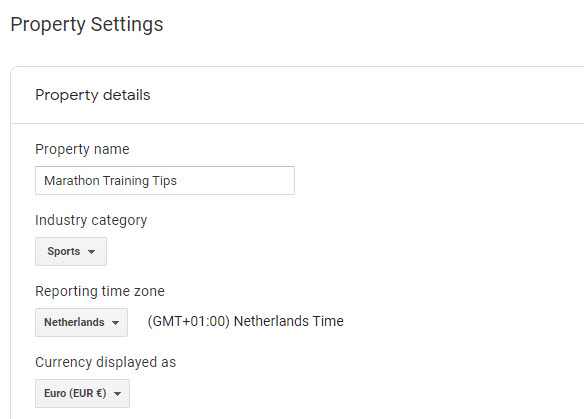
Under property settings you can define the following items:
- Property name: the name of property (make sure it reflects your business and is easily recognizable)
- Industry category: best matching industry category (probably used by Google for benchmarking)
- Reporting time zone: match it with the best suitable time zone of your business (don’t change it after)
- Currency: global currency setting (when trading in multiple currencies, choose the one you wish to report on)
Here is an example of a setup in Google Analytics 4.
There are a few more options in this area:
- Move property
- Move to rubbish bin
Move property
Please note that moving a GA4 property requires you to first disconnect your Universal Analytics property from Google Analytics 4.
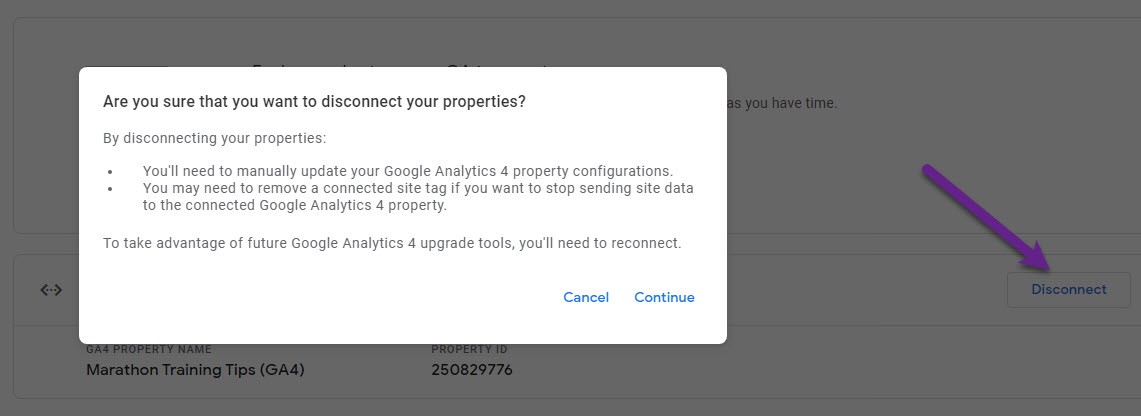
Now, you are free to move your property to a different Google Analytics account.
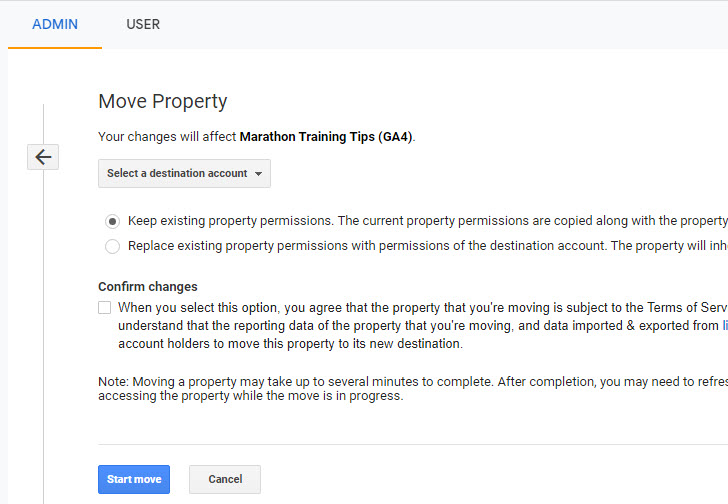
You need to choose how you want to set up the property permissions for the related property.
There can be several reasons for moving it:
- User permissions and access management changes
- Account structure changes
Move to Rubbish Bin
The other option is to move your property to Rubbish Bin.
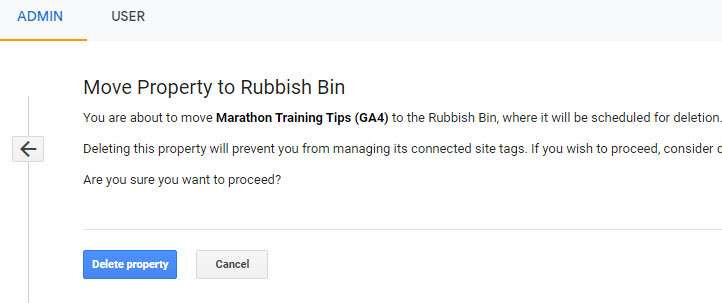
It goes without saying, but please be careful when removing properties (as mentioned, they first go in the Rubbish Bin).
3. Property Access Management
Managing access levels is crucial, so make sure to set user roles and data restrictions wisely.
Only Administrators can access this part of a Google Analytics 4 property.
In Google Analytics 4 there are two “levels” of permissions:
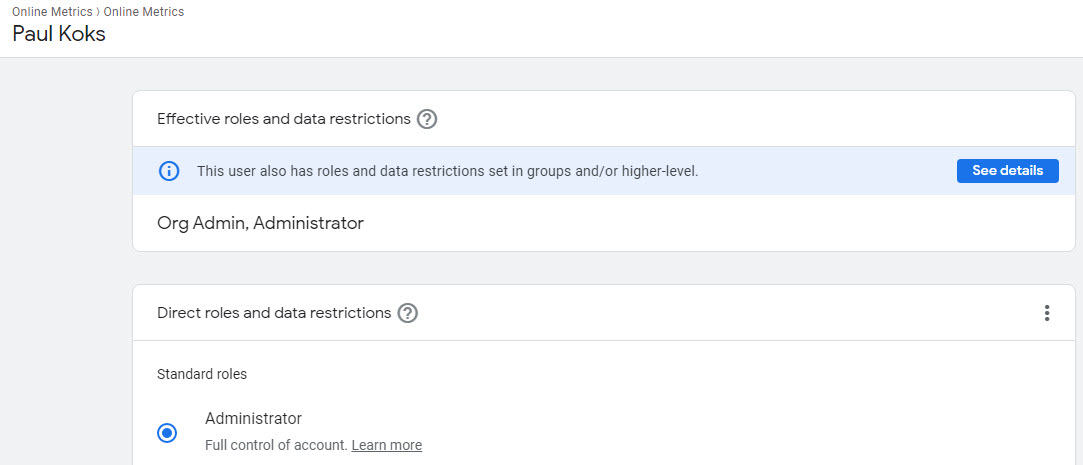
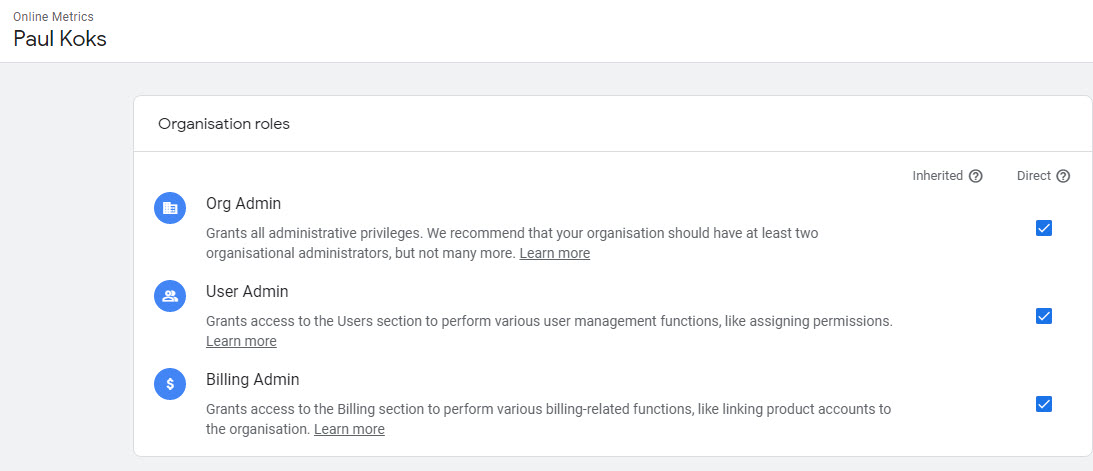
- Effective permissions: roles and data restrictions that a member is assigned via other resources (like the organization, a user group, or an account that includes the current property) plus all the direct permissions assigned explicitly for the current resource.
Here is an example:
Account inheritance
Organizational inheritance
- Direct permissions: roles and data restrictions that a member is assigned explicitly for the current resource (e.g., organization, account, property).
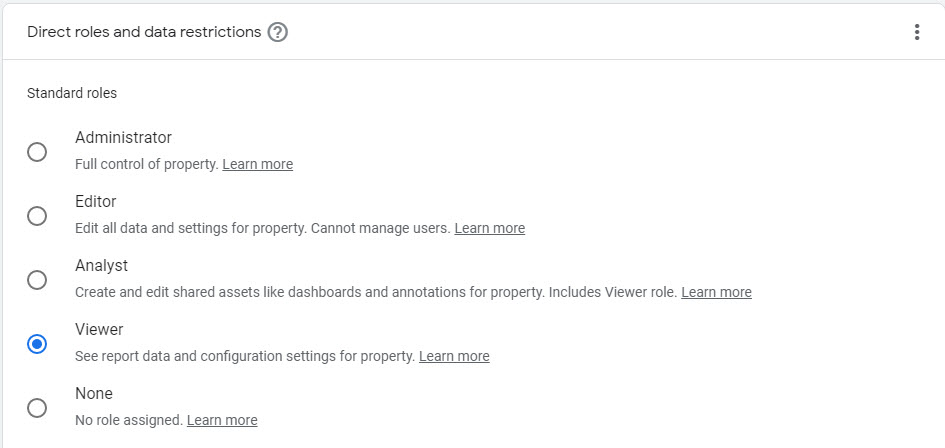
The above illustrates that you can grant access both at the account as well as property level.
Here are some guidelines:
- In general, provide property level access to most users.
- “Viewer” access is sufficient, unless the user is involved with creating and/or editing assets in GA4.
- More experienced users can be granted access as an “Analyst”.
- Be extremely careful with granting “Editor” or “Administrator” level permissions. One mistake and your data collection is ruined.
Are you cautious on sharing revenue and/or costs metrics to an external agency?
At the bottom of the page – when granting access to a user – you can find these two extra options:

In addition, you can leverage filters and work with user groups.
Filters
Filters allow you to slice and dice through the users that are active in a property.

User groups
User groups allow you to group and manage users based on user roles and data restrictions.

I recommend making yourself familiair with all the options and setting up a well-defined structure for your users. And make sure to revisit it periodically (i.e. each month or quarter).
4. Data Streams
In this section you can find all the data streams that are active within a GA4 property.
Here is an example of the Google Merchandise Store:
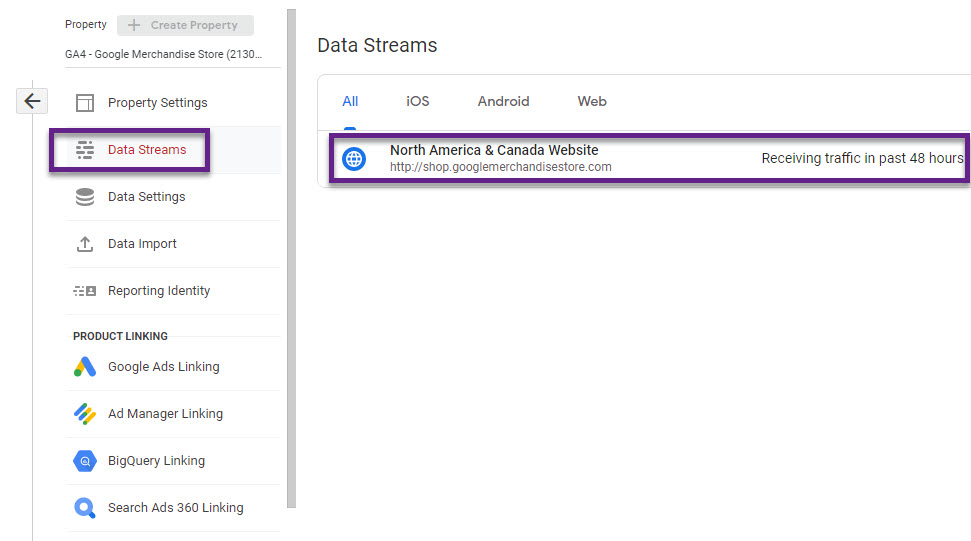
There is one “live” data stream collecting Web data. Click on the data stream and you will see the options below.
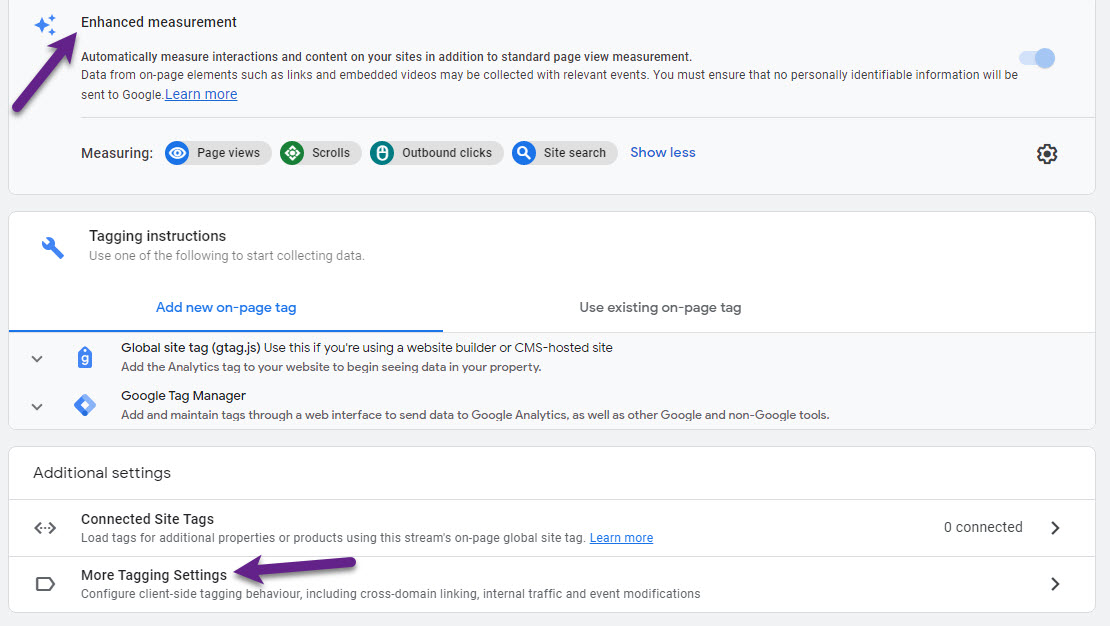
Enhanced Measurement provides the opportunity to track certain user interactions automatically. Read this blogpost to learn more.
More Tagging Settings lets you control a few other important items within Google Analytics 4:
- Modify events: modify an event name, this option doesn’t work retroactively.
- Create events: create a new (custom) event based on an existing event.
- Configure your domains: specify multiple domains for cross-domain tracking.
- Define internal traffic: enables you to block internal traffic from the regular reports.
- List unwanted referrals: similar working as referral exclusion list in Universal Analytics.
- Adjust session timeout: change the default settings of “session timeout” and “time for engaged sessions”.
In short, in this section you can define specific measurements and settings for a related data stream.
5. Data Settings
Under “Data Settings” you can modify the settings in three different areas:
- Data Collection
- Data Retention
- Data Filters
Data Collection
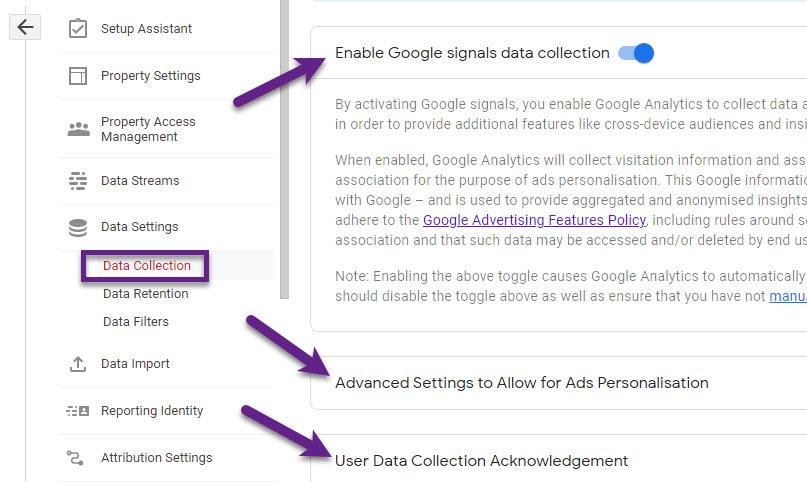
- Google Signals is required if you want to set up audience lists in your linked Google Ads account. You should also enable this feature if you want to use the demographics reports in GA4.
- After you enable Google Signals, you can enable/disable certain countries for Remarketing campaigns. You can do this under the “Advanced Settings to Allow for Ads Personalisation”.
- The last settings refers to a privacy disclosure / data collection acknowledgement.
Data Retention
This setting lets you control how long data for unique users is stored within a Google Analytics 4 property.
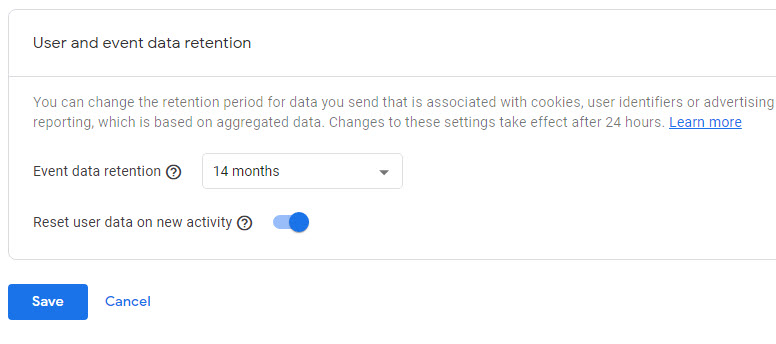 Event data retention can be set to “2 months” or “14 months”.
- Toggle “Reset user data on new activity” on if you like to reset the “event data retention period” upon subsequent sessions.
- This feature doesn’t affect the aggregated, standard reports in GA4.
- It does affect the custom reports that you set up via the “Explore” section.
Data Filters
Data filters allow you to filter two types of traffic:
- Internal traffic: apply filters based on a single IP or range of IP addresses.
- Developer traffic: apply filters based on the event parameter “debug_mode=1” or “debug_event=1”. This is very useful when you are debugging your website – you can still review the data in DebugView (real-time).
In short, the options within data filters are currently still limited compared to filters in Universal Analytics. I expect this to change in the near future.
6. Data Import
Data Import lets you upload data from external sources and join it with your Analytics data. That is one of the more advanced features in Google Analytics 4.
Currently, you can import the following data types:
- Cost data
- Item data
- User data (by User ID or Client ID)
- Offline event data
You need to create a data source before importing any data.
A data source is the combination of two things:
- The CSV file you want to upload
- A mapping of existing Analytics fields to the fields in your CSV.
Read this support article to learn more and get started.
7. Reporting Identity
The “Reporting Identity” in Google Analytics 4 refer to how your web or app users are identified.
GA4 is able to stitch sessions together based on three identifiers / identity spaces:
- User ID (if enabled)
- Google Signals (if enabled)
- Device ID
- Web: Device ID = Client ID
- App: Device ID = app-instance-ID
User ID is the most accurate and can support you in identifying users across multiple devices and browsers.
I won’t dive into the technical details of the User ID implementation in this post. Basically, you will send Analytics a unique ID that you assign to each of your signed-in users. Very powerful, but not always easy to implement.
I recommend setting it as follows (even if you haven’t implemented User ID).
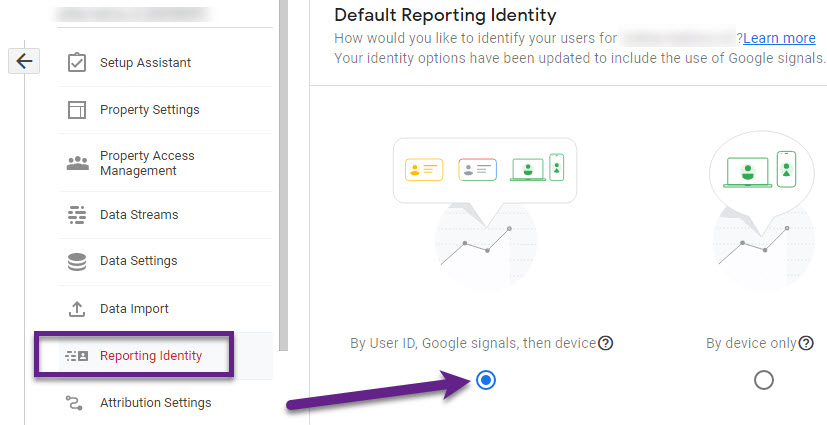
Please note that “Google signals” will not be listed if it is disabled in your property. Google signals might have a positive impact on how Google can report User level data. Turn it on if you can, but be cautious on potential privacy implications.
8. Attribution Settings
Potentially, this Google Analytics 4 property setting is very powerful. It allows you to change the attribution settings that are applied to the standards reports in Google Analytics.
Reporting Attribution Model
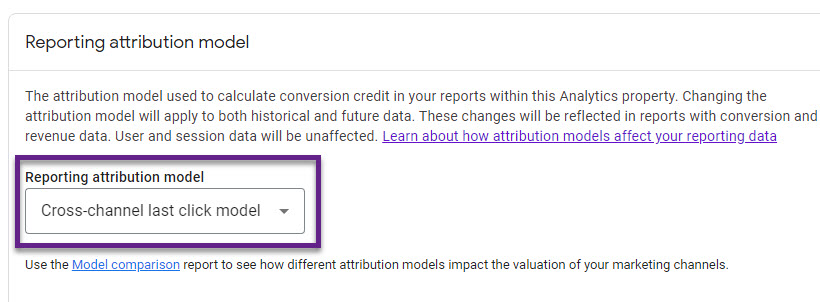
- Choose between Cross-channel last click or Ads-preferred last click.
- Cross-channel last click: ignores direct traffic and attributes 100% of the conversion value to the last channel that the customer clicked through (or engaged view through for YouTube) before converting.
- Ads-preferred last click: attributes 100% of the conversion value to the last Google Ads channel that the customer clicked through before converting. Cross-channel last click will be applied if there are no Google Ads interactions.
- Changes will apply to both historical and future data.
- I expect more attribution model options (i.e. data-driven attribution) to become available in the future.
- This setting affects conversion and revenue data.
Update on January 7, 2022.
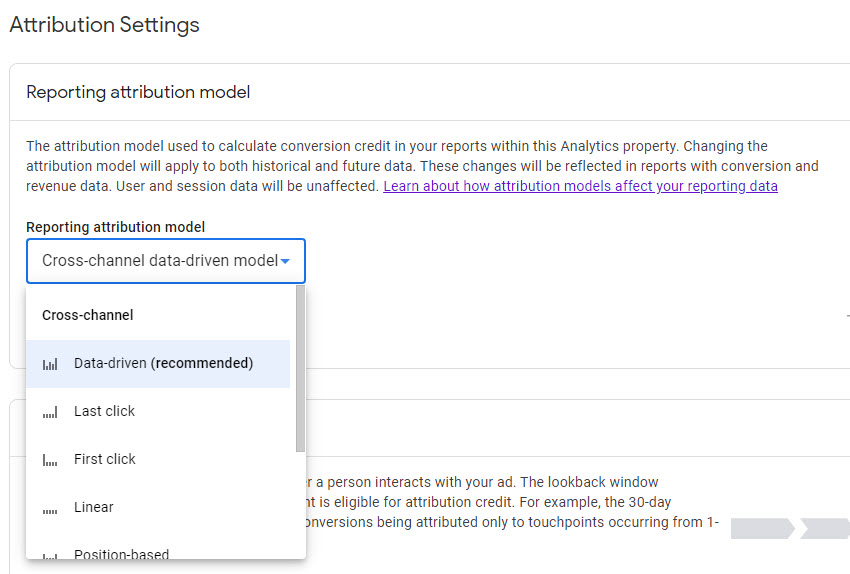
The cross-channel data-driven attribution model (DDA) and some other attribution models are available now.
Lookback Window
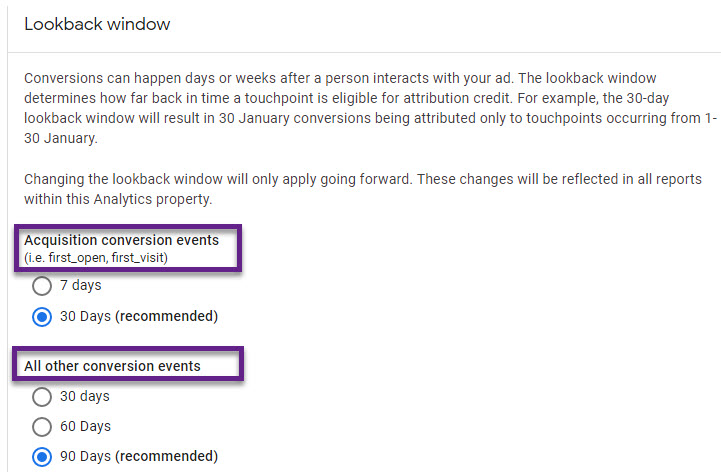
- For acquisition conversion events (first_open and first_visit), the default (recommended) lookback window is 30 days. Switch to 7 days if you have different attribution needs.
- For all other conversion events, the default (recommended) lookback window is 90 days. Switch to 30 days or 60 days if you have different needs.
- The lookback window applies to all attribution models and all conversion types.
- Changes will only apply to future data (not retroactively).
- This setting affects all data permanently.
In short, these settings are very powerful and the options will be expanded soon. Be aware of the permanent impact when changing the “Lookback window”.
9. Property Change History
The “property change history” section can be very helpful.
It allows Editors and Administrators to review changes made at the property level.
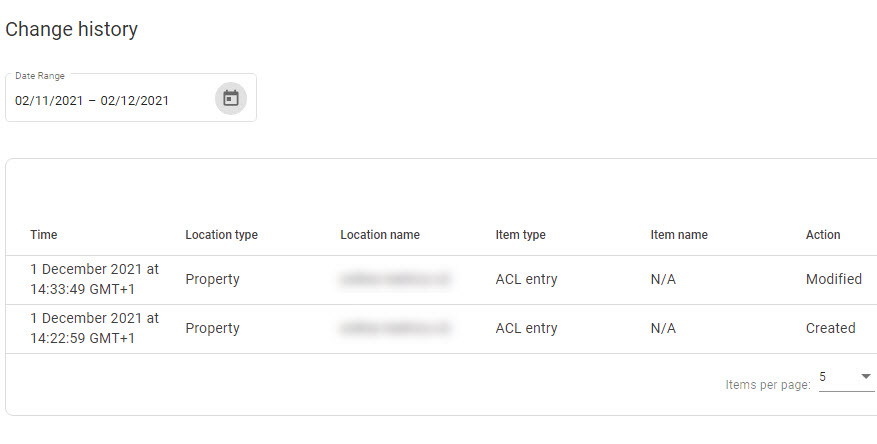 Read this support article to learn more about this section in GA4.
10. Data Deletion Requests
You need the Editor or Administrator role to make data deletion requests in Google Analytics 4.
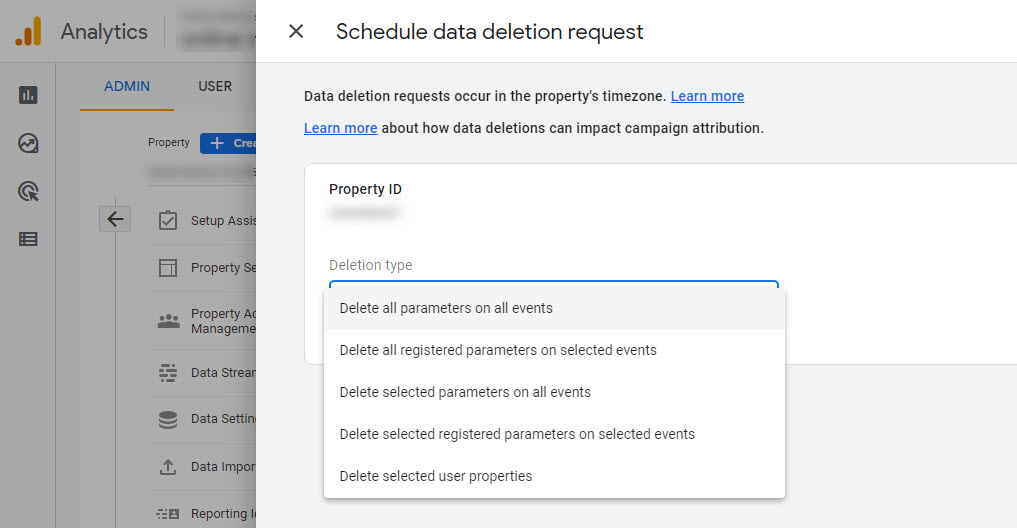
- This feature can be used for deleting data from the server.
- There is a maximum of 25 active (in grace period / pending deletion) requests per property at any one time.
- You can cancel any request within 7 days after creating it.
It’s a big step forward compared to what was available in Universal Analytics. Always proceed with caution as this is a permanent action.
With this new functionality, Google Analytics 4 users will be much better off when choosing what data to keep and what data to delete. It might be a great tool for deleting PII from the server. In a future post I will elaborate on use cases and options.
11. Google Ads Linking
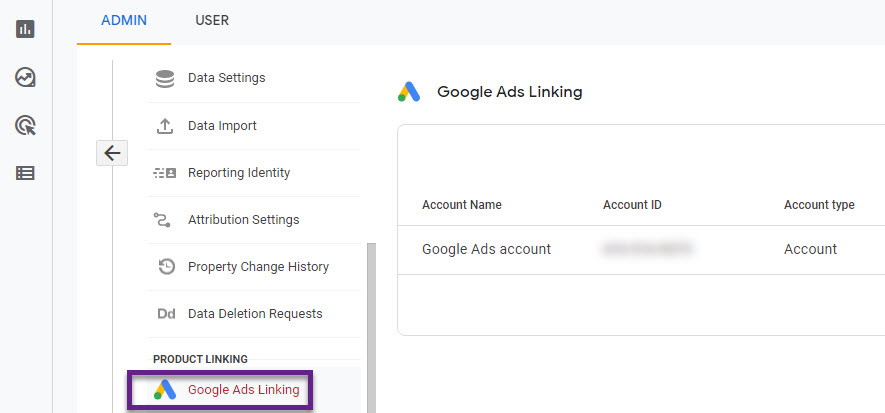
Linking Google Ads to Google Analytics 4 is very straightforward.
Prerequisites:
- In Analytics, you need to have the Editor or Administrator role for the property that you want to link.
- In Google Ads, that same Google account needs administrative access.
Main benefits:
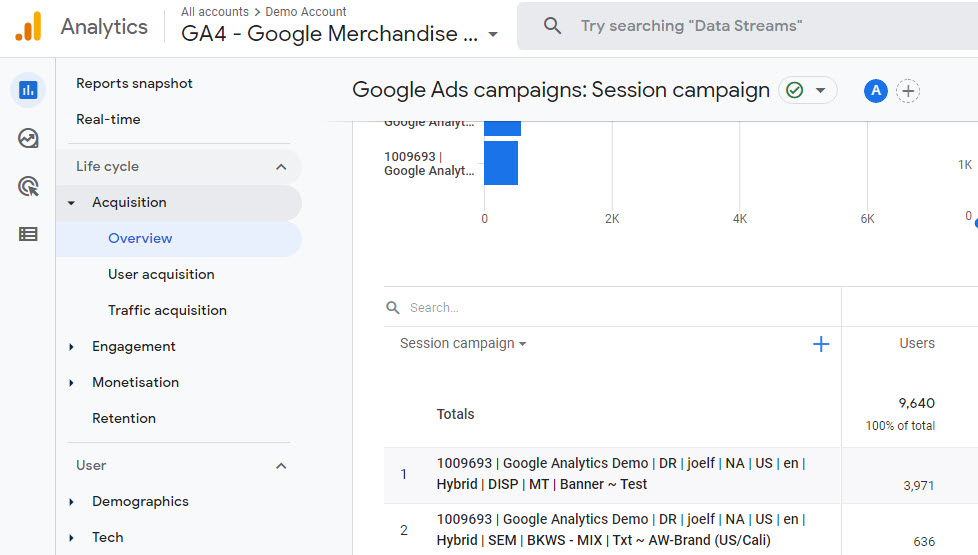
#1 Review Google Ads campaign in the Acquisition overview reports
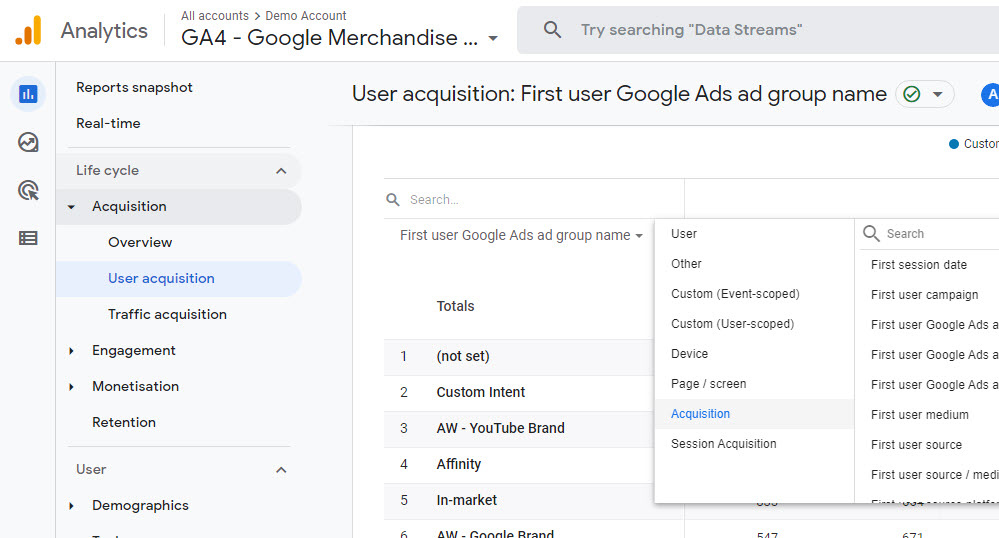
#2 Access new Google Ads dimensions in the User acquisition report
#3 Import Analytics conversions into your Google Ads account
#4 Enhance your Google Ads remarketing with Analytics audience data
#5 Review your Google Ads campaigns in the Advertising workspace
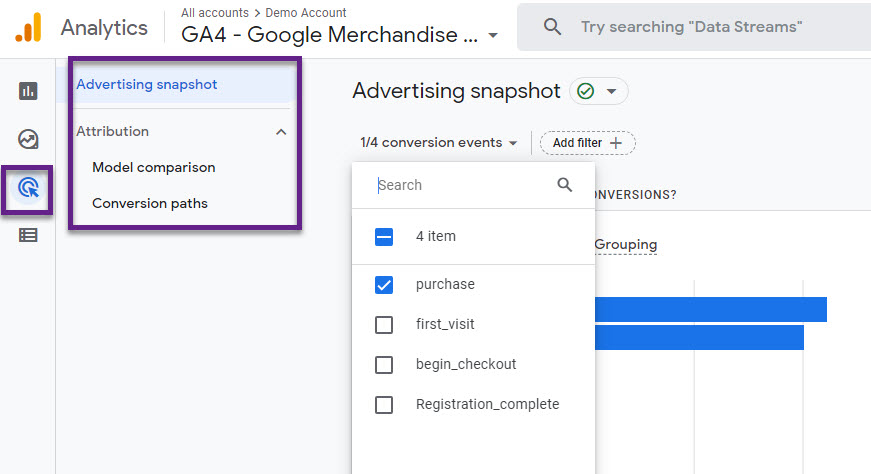
Read this support article to get started with Google Ads Linking.
12. Ad Manager Linking
Ad Manager is mainly used by large scale publishers.
Read this quick tutorial if you use Ad Manager and still need to link it to GA4.
13. BigQuery Linking
This is one of the coolest new features in Google Analytics 4, available for free!
You can now link your Google Analytics 4 property to BigQuery.
“There are no billing charges associated with exporting data from a Google Analytics 4 property to BigQuery. You can export to a free instance of BigQuery (BigQuery sandbox). However, exports that exceed the sandbox limits incur charges.”
A couple of advantages and use cases are listed below:
- No sampling
- Unlimited amount of dimensions
- Calculate aggregated goal completions
- Build customized Channel Groupings
- Correct data errors on historically collected data
- Combine Google Analytics data with third party data sources
- Use native connectors to push BigQuery data into advanced visualizations tools
Learn how to link BigQuery to your Google Analytics 4 property.
14. Search Console Linking
Now you can also link your Search Console property to GA4. And get more SEO insights through your GA4 reporting!
I will write a complete post on this at a later time, but let’s go through the linking process together.
Link Search Console to GA4
Step 1: Navigate to GA4 / Admin section and click on “Search Console Linking”.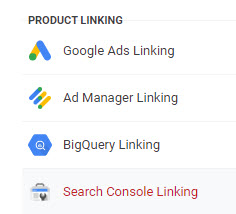
Step 2: Click on “Link” in the top right corner.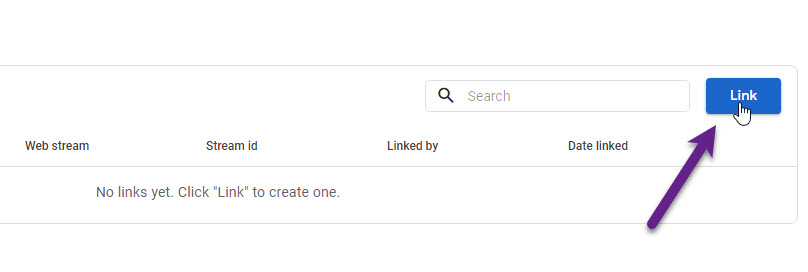 Step 3: Choose to which Search Console property to connect.
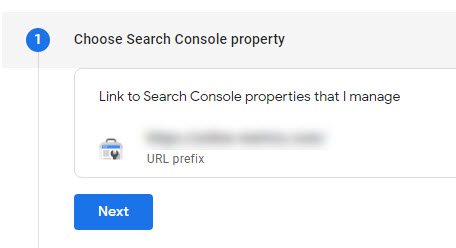
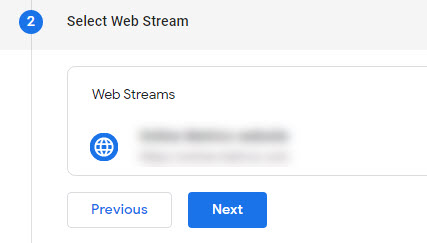
Step 4: Select Web Stream.
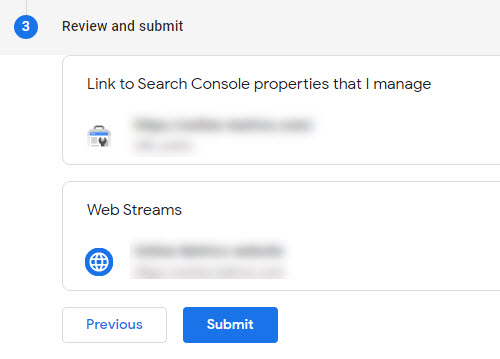
Step 5: Review and submit.
Search Console Reports
You can review your Search Console data in several ways.
One easy way is to navigate to the Acquisition Overview report (located under Life cycle > Acquisition > Acquisition overview)
Two news widgets are shown at the bottom.
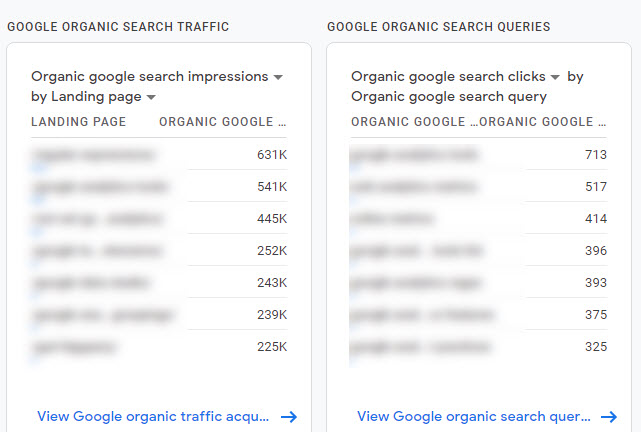
- Google organic traffic acquisition
- Google organic search queries
Click on one of the items for more detailed reporting.
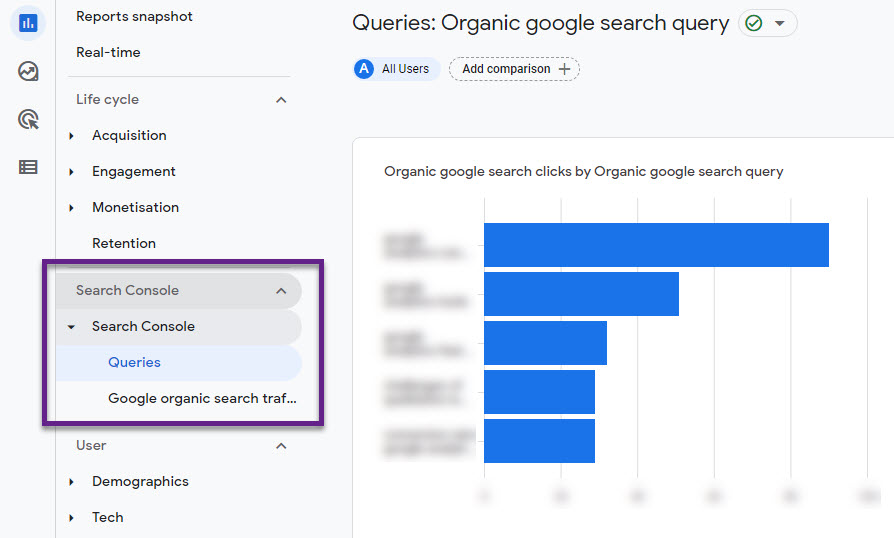
Another option is to publish the Organic search reports via the Library.
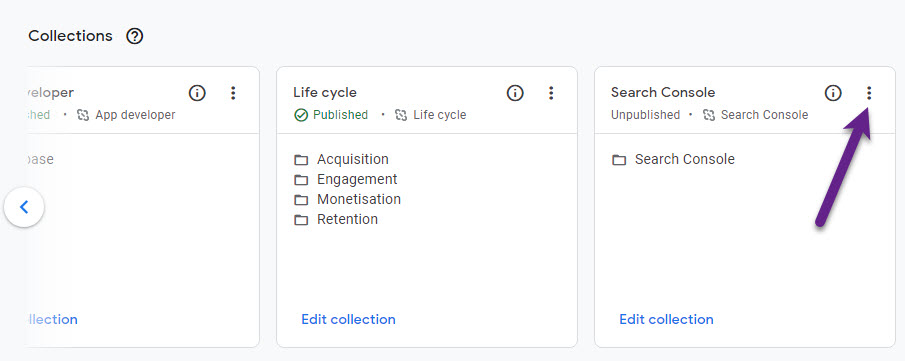
Simply click on “Publish” to add them to GA4 and the regular reports in your menu.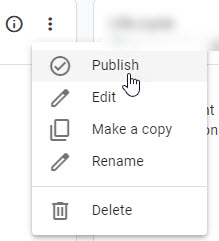
Here you go:
Note: not everybody can set up this link.
- You must be an Editor in your GA4 property.
- The same email address must be a verified site owner of the Google Search Console property.
15. Analytics Intelligent History
Analytics Intelligence search history is stored for better personalization of Analytics search results.
Click Admin, and in the Property column, click Analytics Intelligence Search History to see the activity saved in your GA4 property.
Users with the Editor or Administrator role can delete past search activity on a property.
This is it from my side. Do you have any thoughts or questions? Happy to hear your comments!
One last thing... Make sure to get my automated Google Analytics 4 Audit Tool. It contains 30 key health checks on the GA4 Setup.
Hey Paul,
Absolute brilliant content on property section!!!
What is the work around for views at the moment, since it is not available in GA4 yet. For example, how to create different type of filters (excluding internal traffic+dev traffic)
Thanks in advance!
Hi Anil,
Thanks for the heads up!
Unfornately, there isn’t a concept in GA4 reporting that comes really close to filters (yet).
There are some options though that you can check out to create something similar:
1) Create another GA property and only send the data that you need to see in that property.
2) Use the GA4 integration with BigQuery and create “views” in that tool. You can send the data to visualization tools such as Google Data Studio or Tableau.
3) Use Analysis Hub / Explore in GA4.
It will take quite some time, but it’s doable if you have the required knowledge.
Here you can find how to create filters:
https://support.google.com/analytics/answer/10108813?hl=en
Best,
Paul