Correctly implementing GA4 Ecommerce requires both time and resources. Read this article to learn all about the most important aspects of GA4 Ecommerce.
I have reviewed dozens of GA4 implementations in the last year. The Ecommerce implementation in Google Analytics 4 is a hurdle many companies are struggling with.
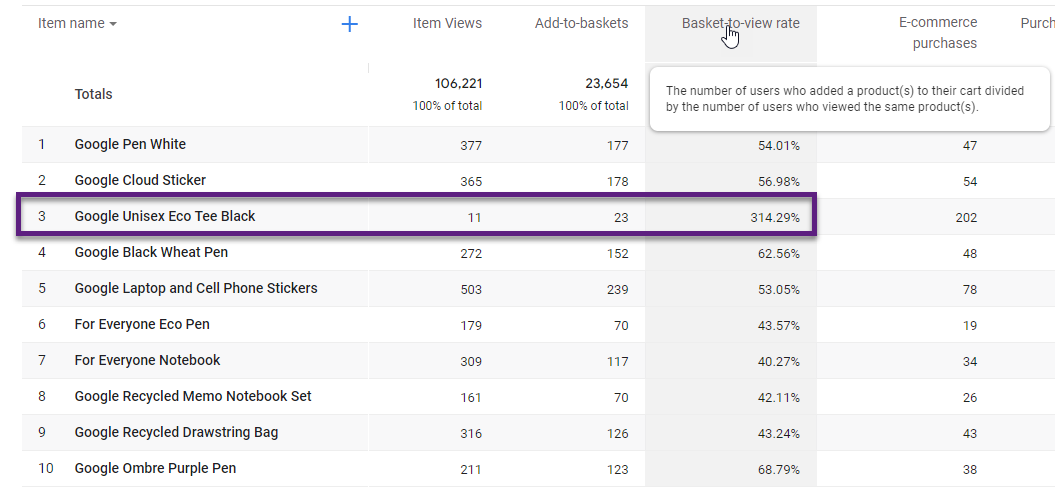
You might discover many issues if you debug GA4 implementations or review the data collected (issue example of the GA4 Google Demo Store is shown above).
In this blogpost I will go far beyond the GA4 Ecommerce code implementation and address many other topics that are crucial as well.
Table of Contents
- Planning
- GA4 Ecommerce Implementation
- GA4 Test Property
- Use Cases / Scenarios
- The Role of Recordings
- GA4 Ecommerce Configuration
- Attribution and Referral Exclusions
- Custom Dimensions and Metrics
- Concluding Thoughts
Ok, let’s dive right in!
Planning
Planning is the crucial aspect to get right when you want to implement Google Analytics 4 Ecommerce.
This is especially true if you don’t have automatic GA4 integrations on your website (i.e. via WordPress plugins).
GA4 Ecommerce comes with many options around what you can track. All available GA4 Ecommerce events are displayed in blue.
- Product list impression (view_item_list)
- Product click (select_item)
- Product page view (view_item)
- Product add to cart (add_to_cart)
- Product remove from cart (remove_from_cart)
- Cart page view (view_cart)
- Product add to wishlist (add_to_wishlist)
- Checkout start (begin_checkout)
- Provide shipping information (add_shipping_info)
- Provide billing information (add_payment_info)
- Purchase complete (purchase)
- Refund complete (refund)
- Internal promotion banner view (view_promotion)
- Internal promotion banner click (select_promotion)
Can you imagine how much work and stress it brings if you try to implement it all at once?
This is where many companies struggle – coming up with a sold, realistic planning instead of doing it all at once.
You will fail if you try to get this job done in no time.
How to go about it? Take a phase-based approach.
Here is a suggested schedule (modify it based on capacity and experience).
Phase 1
- Purchase complete (purchase)
Phase 2
- Provide billing information (add_payment_info)
- Provide shipping information (add_shipping_info)
- Checkout start (begin_checkout)
- Cart page view (view_cart)
Phase 3
- Product remove from cart (remove_from_cart)
- Product add to cart (add_to_cart)
- Product page view (view_item)
Phase 4
- Product click (select_item)
- Product list impression (view_item_list)
- Product add to wishlist (add_to_wishlist) // if applicable
Optional
- Refund complete (refund) // if applicable
- Internal promotion banner view (view_promotion) // if applicable
- Internal promotion banner click (select_promotion) // if applicable
The duration of each phase depends on your Dev capacity and familiarity with the implementation.
Also, it is totally ok to first go for phase 1 to 3 and tackle the other events at a later stage. The accuracy of your implemented events and tracking is much more important than covering everything.
The reason for covering the ‘purchase’ as the only event in phase 1 is because of it being absolutely crucial. Get purchase tracking wrong and the rest of the implementation doesn’t make a lot of sense.
GA4 Ecommerce Implementation
By now, you have a solid planning documentation which will guide you through the implementation.
This blogpost doesn’t aim to provide all technical details on the implementation.
There are already many technical guides out there.
Hands down the one of Simo Ahava is the best, most thorough, accurate one.
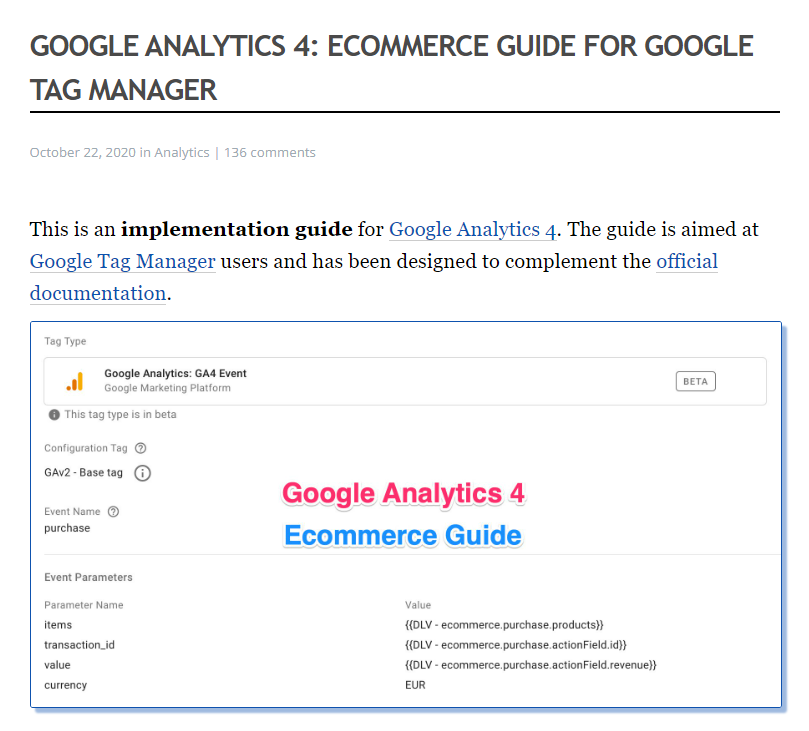
Start here if you want to:
- Learn about the difference between Universal Analytics and Google Analytics 4 Ecommerce.
- Implement the Ecommerce integration via Google Tag Manager.
- Get a clear overview of all the
dataLayer.pushsnippets required.
Obviously, this is a crucial part, but there are many more things you need to get right.
GA4 Test Property
In this post, I discuss the importance of and how to set up a GA4 test property.
The magic lies in a Lookup Table variable where you push the data to either a Live or Dev GA4 instance based on the {{Page Hostname}} variable. There are other options, but this works very well in general.
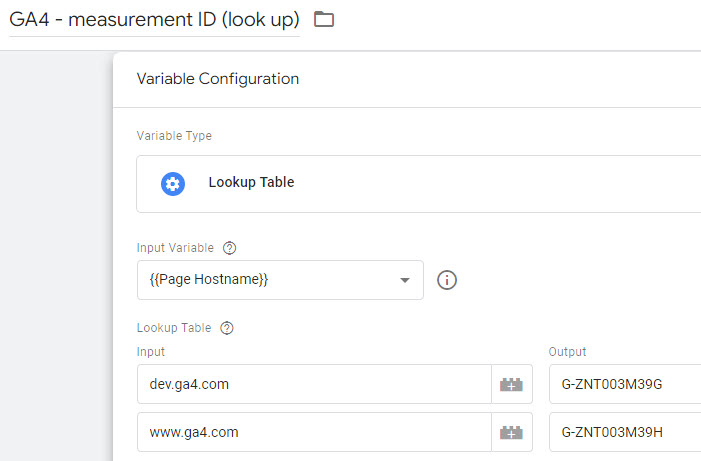
In short, it is highly recommended to create both a live and test property.
Sample process for phase 1: ‘purchase’ event.
- Provide your Dev team with clear documentation on the ‘purchase’ event. Don’t solely link to Simo’s post, but create an example of the
dataLayer.pushsnippet(s) required. Also, the code examples need to match your unique situation. - The Dev team implements and tests the required code on the test domain.
- After, you and/or your team tests the implemented code and provides feedback if needed.
- If needed, the Dev team implements the code changes and you do a retest again untill everything works as expected.
- The ‘purchase’ event tracking is deployed on the live domain.
- If possible, thoroughly test and review the GA4 Ecommerce implementation in live.
That’s it! Sounds simple? Well, you will find this to require a lot of effort from many people and teams involved.
Hopefully, by now you agree it isn’t the smartest thing to try to implement 14 Ecommerce events in one batch!
Use Cases / Scenarios
When you work with your Dev team, it is crucial to give practical, detailed instructions on the implementation.
Let me show this in more detail for the event below:
- Product add to cart (add_to_cart)
Minimum
At a minimum, share the dataLayer.push snippet with a real example of how the add_to_cart event needs to be integrated on the site.
- Fire the
add_to_cartevent when a new product is added to the cart. - Fire the
add_to_cartevent when the quantity of an existing item in the cart increases. - Make sure that the
quantityparameter is equal to the ‘new’ item quantity minus the ‘old’ item quantity.
Better
When a product is added to cart, fire these codes. These codes apply to all scenarios / environments where the quantity of a product is changed, including the scenarios when the user updates the size/quantity of a cart line item.
Fire the add_to_cart event on these pages:
- PDP
- PLP
- Mini Cart
- Cart Page
- Cart Edit Page
- Wishlist
Best
It’s even better and more clear when you include a screenshot for each of the scenarios.
Here is an example:
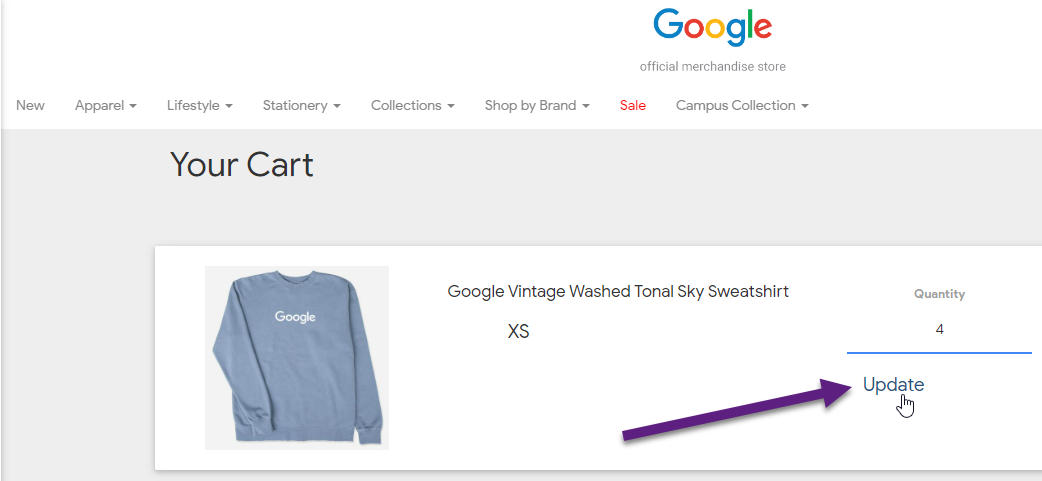
The user increases the quantity of this product from 2 to 4. Thus, fire an add_to_cart event with quantity = 2.
Most important takeaway: make sure to be crystal clear in terms of what to implement and where.
You will be amazed how you can greatly reduce the total workload if you approach it like this!
The Role of Recordings
Recordings are incredibly powerful for many reasons.
Sometimes it is so much easier to convey your message by a recording than only written feedback/recommendations.
With great success I use them both in the implementation preparation phase as well as when providing detailed feedback on implementation issue.
A simple tool to check out is Screencast-O-Matic.
There are many more options on the market, but I have found this one very easy to use and affordable for everyone.
GA4 Ecommerce Configuration
In Universal Analytics you are used to take a few steps in the admin section to integrate Enhanced Ecommerce.
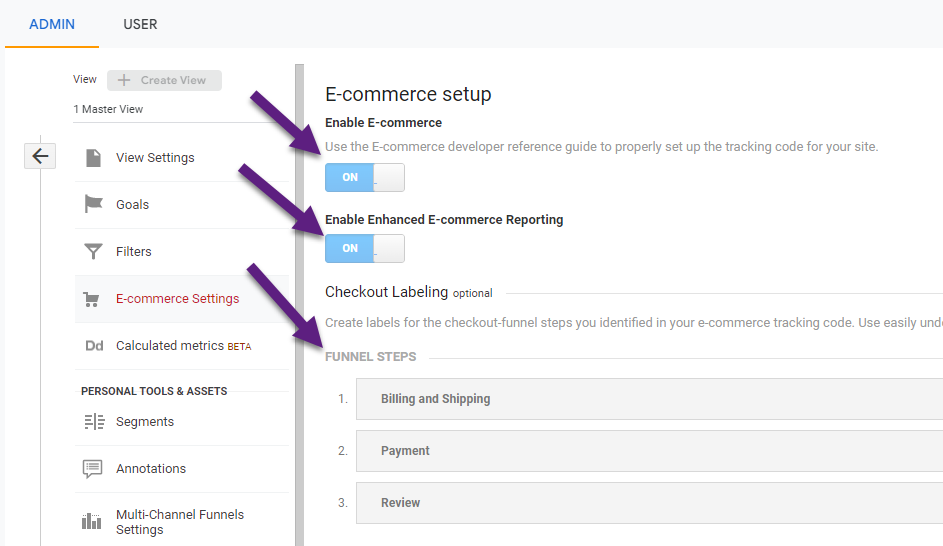
GA4 Ecommerce works a bit differently as you can define specific reports in the Explore / Advanced section to analyse Ecommerce data.
Here is an example of a funnel analysis exploration.
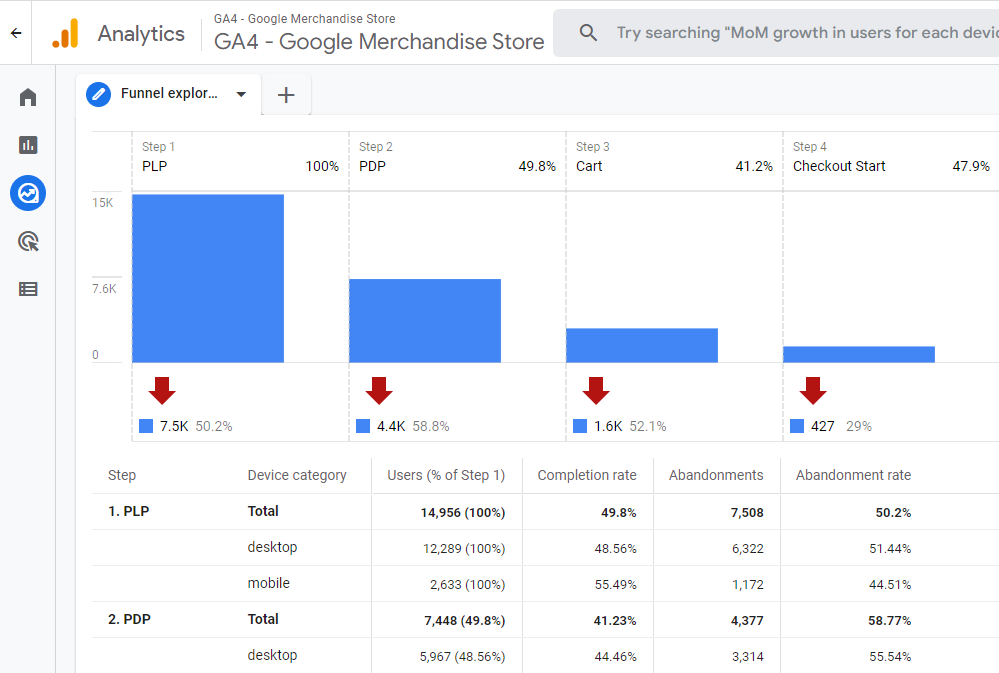
I highly recommend reading my previous post on GA4 funnel tracking to master this concept.
So this is more a ‘custom’ report setup and not really a configuration thing in the GA4 admin.
However, you need to register GA4 Ecommerce parameters to use them as a custom dimension or metric.
This is something I will discuss a bit later.
Attribution and Referral Exclusions
Another important topic to pay attention to is correct attribution.
In the test phase it can be challenging to demystify all attribution issues.
But, when you go live with purchase tracking you need to closely monitor sales attribution.
- In general, analyse the distribution of transactions and revenue across channels.
- Pay special attention to referrals and potential third-party payment processors that take credit for sales.
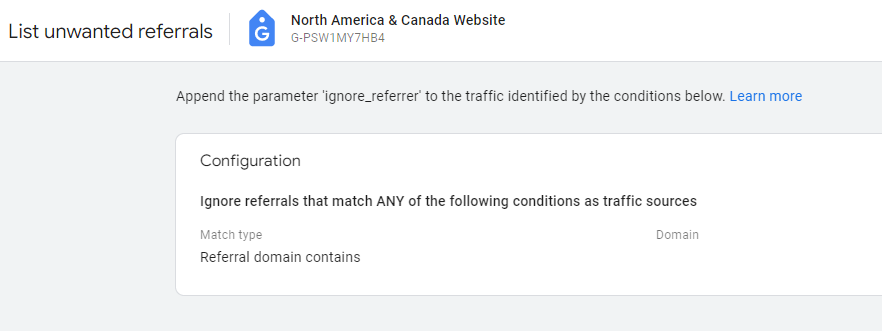
The setting above allows you to add certain domain that Google needs to ignore.
This is how it works:
“Referrals are the segment of traffic that arrives on your website through another source, like through a link on a third-party domain. Analytics automatically recognizes where traffic was immediately before arriving on your site, and displays the domain names of these sites as the referral-traffic sources in your reports.”
Here you can learn how to exclude unwanted referrals.
A quick way to demystify all potentials referrals you want to ignore is by creating this Explore report.
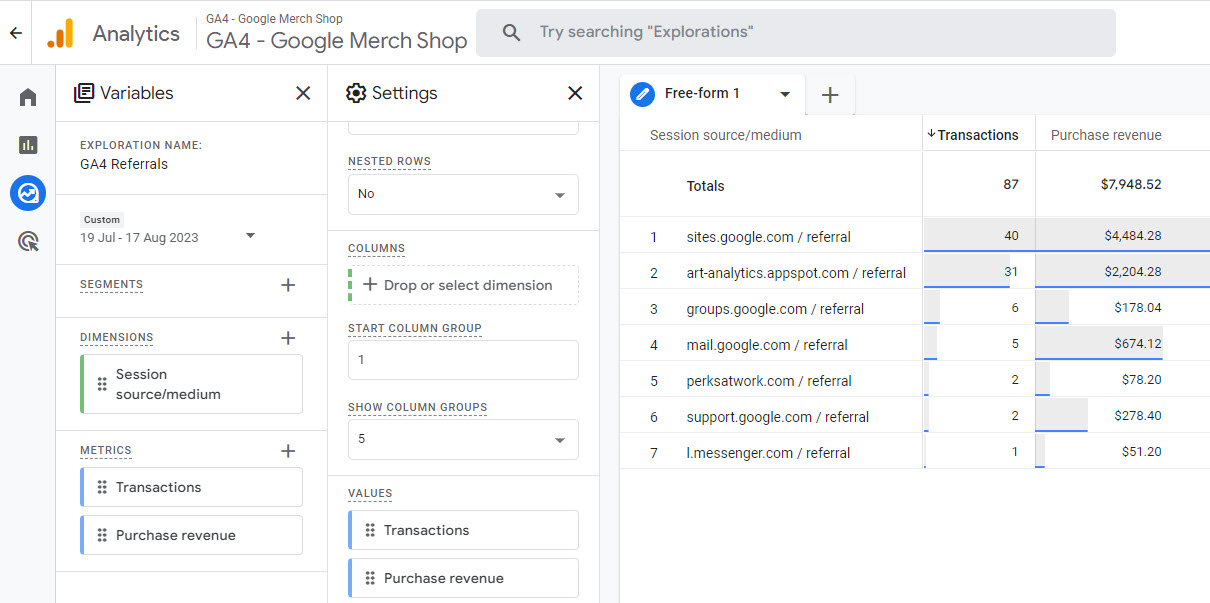
(the report also includes a filter on ‘Session source/medium’ contains ‘referral’)
Next step is to identify all third party payment providers in the report that you need to exclude and add them to the unwanted referrals list.
Maybe you already spot certain referrals in your Universal Analytics reporting or setup that you want to add to GA4 as well!
Custom Dimensions and Metrics
You can review and and analyse all event parameters in BigQuery.
But, you need to set up the connection between GA4 and BigQuery and have the necessary skills to extract meaningful insights.
In addition, it is a best practice to register GA4 Ecommerce related parameters in the GA4 UI if not available on default.
Not doing so will result in the parameters not being available in the basic GA4 UI and Explore section.
I recommend, if applicable to your GA4 implementation, to register these parameters (including the implementation phases as previously discussed):
Phase 1
- Purchase complete (purchase)
- Parameters: ‘tax’ and ‘shipping’ // custom metric
Phase 2
- Provide billing information (add_payment_info)
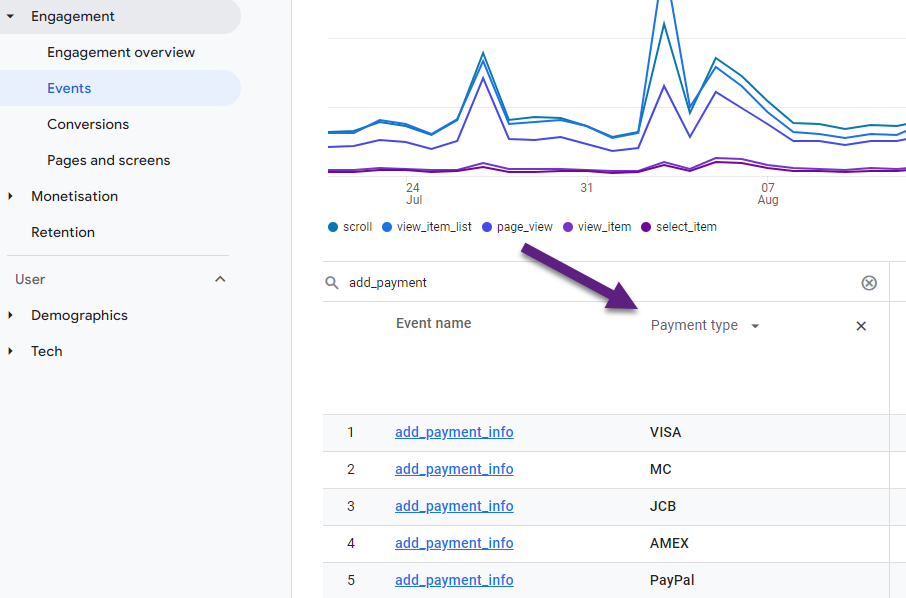
- Parameter: ‘payment_type’ // custom dimension
- Provide shipping information (add_shipping_info)
- Parameter: ‘shipping_info’ // custom dimension
Here is a quick support article on creating custom dimensions and metrics in GA4.
And this is an example of where you can see the data in the standard reports.
Concluding Thoughts
GA4 Ecommerce is challenging especially if you want to get everything done in a very short period of time.
Setting up a clear implementation strategy will safe you time and increase the accuracy of your implementation and data collection.
In this post you can find several steps and tips that help foster a solid Ecommerce implementation in Google Analytics 4.
There are many things to get right if you want to get the most out of GA4 and Ecommerce is just one of them.
This is it from my side. Looking forward to hear about your experience with Google Analytics 4 and Ecommerce.
One last thing... Make sure to get my automated Google Analytics 4 Audit Tool. It contains 30 key health checks on the GA4 Setup.
A combination
Dimensions: Source/Medium/Transaction ID
Metrics: Transactions/Transactions per purchase
is not possible.
https://app.screencast.com/Z33TAqSZZ7br0
“No data for this combination of segments, values, filters and date range. Try editing the variables or settings or remove them.”
https://app.screencast.com/1nBtwhIuJrlaE
Thank you for bringing this up. I have changed the screenshot in this blogpost to include ‘Session source/medium’ instead of ‘Source/medium’ and ‘Purchase revenue’ instead of ‘Ecommerce revenue’. The ‘Source/medium’ dimension relates to Attribution and should not be used here. Mistake corrected! Could you please try again and let me know if it works now?
Yes :) I just found out… thanks a lot
https://app.screencast.com/7t2SQnqdHjqXr
Perfect, great to hear that! :-)